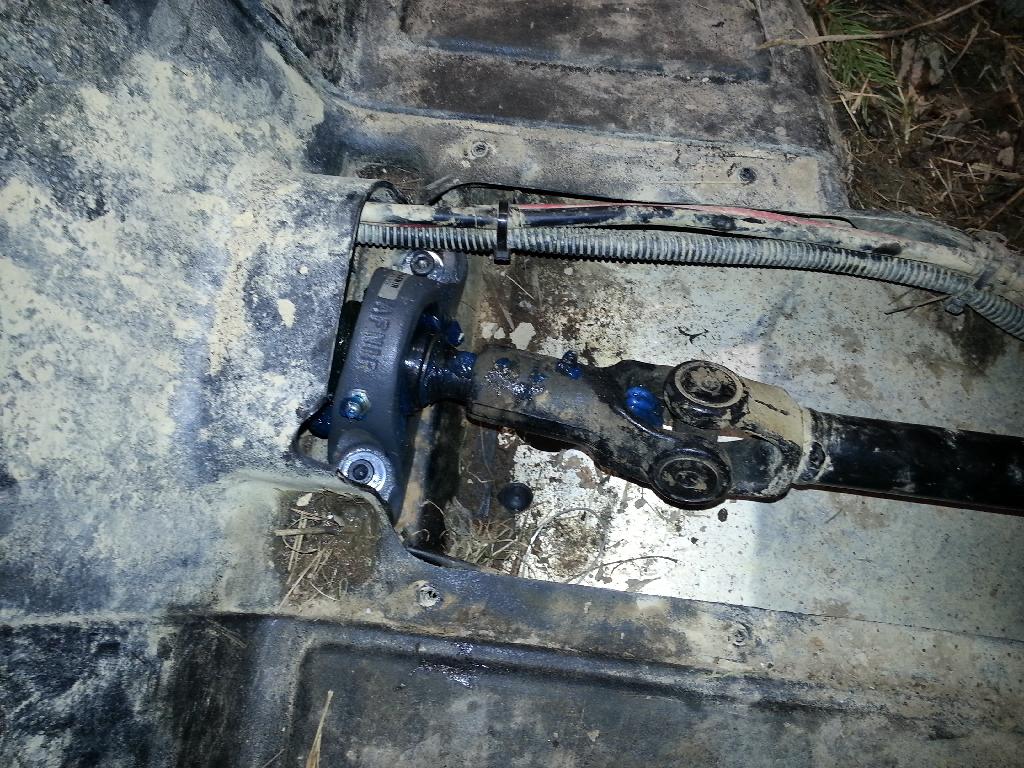
Most of this info can be found on the big forum, but it takes a lot of searching because the info is scattered all over the place.
Remember the following info only pertains to the 2011 900XP's. The 2012's and 2013's used a different setup.
I imagine most 2011 owners have already replaced their carrier bearing, but mine was purchased as a leftover so it has less trail time than most. I had heard my bearing squeaking last fall and when it became difficult to push in neutral on a concrete floor, I new I had better change it before the riding season started. My XP has the 5 year Polaristar extended warranty, so I could have gotten it fixed free minus the $50 deductible, but then I knew I would be doing it again next year with them installing the same OEM bearing. And there is actually nothing wrong with the OEM bearing, it is a standard UC206 greasable industrial bearing. But the problem is Polaris decided to mount it in a non-greasable stamped sheet metal pillow block housing. If you took a new OEM bearing, removed it from the sheet metal housing and mounted it in a standard greasable pillow block, it would have the same effect as doing the conversion.
2011 900XP purchased new in June 2012 - 787 miles 117 hours.
I cheated and used a fork lift to work on mine, I highly recommend it.

The original bearing. After I removed it, I could not turn it with my fingers.
Soak everything with PB Blaster and hit the grease zerts with some grease before beginning to make removal easier.
If you remove the snap ring and loosen the 2 set screws, you will get enough travel with the splines of the front and rear driveshaft's to slide the front drive shaft off the differential.
I forgot to get a pic of it, but you remove the front driveshaft from the differential by hammering out a roll pin locking the driveshaft to the differential splines. Removing the passenger front tire and using a long roll pin punch makes this very easy.

I did not want to remove my skid plate so I hole sawed a couple of holes directly under the bearing mounting bolts to get access to the nuts. Turns out I only needed to put a hole on the drivers side, the passenger side nut is welded to the cross brace.


Now, the task of finding the perfect bearing and housing. I had the luxury of an entire Industrial Maintenance supply department to pick and choose from. So with some part #'s and specs from the big forum I began my search.

I knew I had a 1-3/16" shaft size so I started there. (F.Y.I. - 30mm also works)
I liked this FAFNIR housing with its elongated holes since I had read on the big forum about some running into hole spacing issues.

But the OEM bearing is 1.5" long and the bearing in that housing while being 1-3/16 diam., is 1.9" long. The 1.5" length is critical, the taper of the rear driveshaft rests against the back side of the bearing and the snap ring rests against the front. That's what holds the rear driveshaft in place to keep it from floating back and forth on its splines.


I had read on the big forum about some using a "206" pillow block bearing, so I went on the hunt for one of those. The mounting holes did not line up well with the original cross member mounts, that's why others had to "waller" out the holes to use one.

I thought maybe I could use the bearing from the 206 in the FAFNIR housing.
Wrong part#, right diameter, too short. 1.3" if I remember correctly.

The part # on the OEM bearing is a UC206, I then knew I had to find either that exact bearing or another manufacturers equivalent and install it in the FAFNIR pillow block housing.

I finally found a SealMaster 2-13 in a 4 hole flange housing that fit all the specs. So popped it out of the flange housing and popped it into the FAFNIR pillow block housing.

Some reported having to cut their plastic to get the thicker mount into place. I simply pulled up a little on the floor board and tapped the housing into place with a hammer. The taper of the driveshaft rested against the back of the bearing and the snap ring fit perfect on the front.

Longer bolts for the thicker housing and 5/16" flat washers.

Everything put back into place.

Hole drilled through console to have easy access to the grease zert.


